Build a Public IP Checker in Django
TL;DR:
This is a tutorial detailing how to quickly build, run, and deploy a Django-based public IP checker app. Check it out!
This tutorial walks you through creating a Django web application that allows users to check their public IP address. It features a home page with a button and a dedicated page to display the user’s IP address. The project uses Bootstrap 5 for styling and FontAwesome for icons.
Files and Demo
You can download the complete project in here:
- https://github.com/Dan-Duran/myip
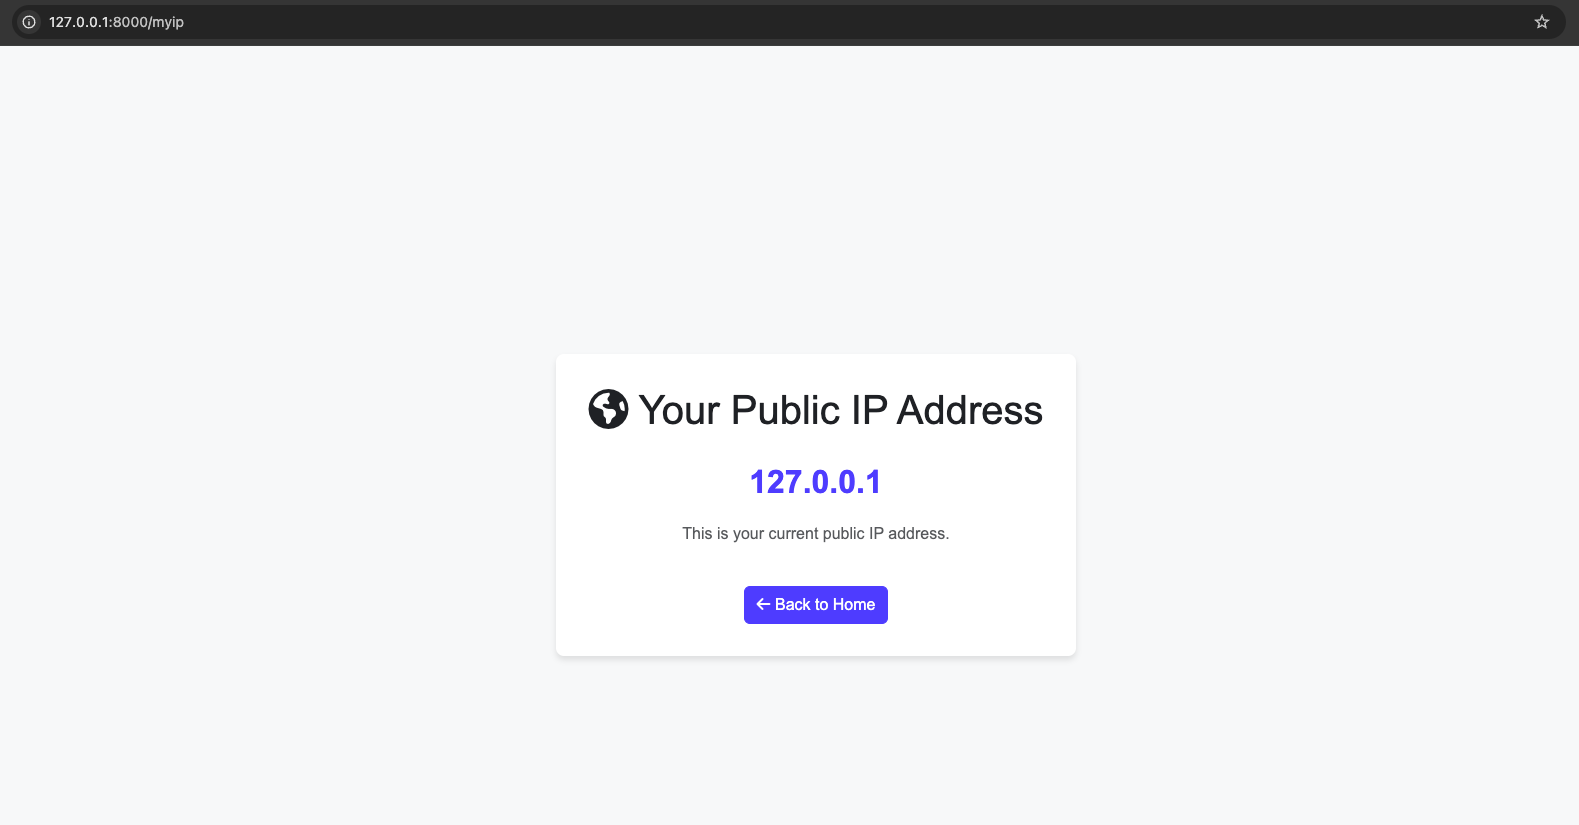
This is a sample of how it looks (adapted to my site)
- https://getcyber.me/tools/myip
Prerequisites
Before starting, ensure you have the following:
- Python 3.8+ installed on your system.
- Django 4.x installed (we’ll show how to set it up).
- Basic knowledge of Python and web development.
Step 1: Setting Up the Project
1.1. Create a New Project Directory
Open a terminal and create a directory for the project:
mkdir myip
cd myip
1.2. Create a Virtual Environment
Set up a Python virtual environment to keep dependencies isolated:
python3 -m venv myip-venv
source myip-venv/bin/activate
1.3. Install Django
Install Django using pip:
pip install django
1.4. Start a New Django Project
Create a Django project named myipproject:
django-admin startproject myipproject .
1.5. Create a Django App
Create an app called myipapp for the project:
python manage.py startapp myipapp
Add myipapp to INSTALLED_APPS in myipproject/settings.py:
INSTALLED_APPS = [
    # Default apps
    'myipapp',  # Add this
]
Step 2: Creating the Views
2.1. Home Page View
In myipapp/views.py, create a view for the home page:
from django.shortcuts import render

def home(request):
    return render(request, 'home.html')
2.2. IP Display View
In the same file, add a view to fetch and display the user's IP address:
def get_user_ip(request):
    x_forwarded_for = request.META.get('HTTP_X_FORWARDED_FOR')
    if x_forwarded_for:
        ip = x_forwarded_for.split(',')[0]
    else:
        ip = request.META.get('REMOTE_ADDR')
    return render(request, 'ip_address.html', {'ip': ip})
Step 3: Setting Up URLs
3.1. Project-Level URLs
In myipproject/urls.py, connect the project to the app's views:
from django.contrib import admin
from django.urls import path
from myipapp import views

urlpatterns = [
    path('admin/', admin.site.urls),
    path('', views.home, name='home'),         # Home page
    path('myip', views.get_user_ip, name='myip'),  # IP display page
]
Step 4: Building the Templates
4.1. Home Page Template
Create a templates directory inside myipapp. Then create home.html:
<!DOCTYPE html>
<html lang="en">
<head>
    <meta charset="UTF-8">
    <meta name="viewport" content="width=device-width, initial-scale=1.0">
    <title>Check Your IP</title>
    <link href="https://cdn.jsdelivr.net/npm/bootstrap@5.3.0-alpha3/dist/css/bootstrap.min.css" rel="stylesheet">
    <link href="https://cdnjs.cloudflare.com/ajax/libs/font-awesome/6.0.0/css/all.min.css" rel="stylesheet">
</head>
<body>
    <div class="container text-center mt-5">
        <h1>Check Your Public IP Address</h1>
        <p class="mt-3">Click the button below to view your public IP address.</p>
        <a href="/myip" class="btn btn-primary btn-lg mt-4">
            <i class="fas fa-search-location"></i> Check My IP
        </a>
    </div>
</body>
</html>
4.2. IP Display Template
Create ip_address.html in the same directory:
<!DOCTYPE html>
<html lang="en">
<head>
    <meta charset="UTF-8">
    <meta name="viewport" content="width=device-width, initial-scale=1.0">
    <title>Your IP Address</title>
    <link href="https://cdn.jsdelivr.net/npm/bootstrap@5.3.0-alpha3/dist/css/bootstrap.min.css" rel="stylesheet">
    <link href="https://cdnjs.cloudflare.com/ajax/libs/font-awesome/6.0.0/css/all.min.css" rel="stylesheet">
    <style>
        .ip-display {
            margin-top: 100px;
            background: #f8f9fa;
            padding: 20px;
            border-radius: 10px;
            box-shadow: 0 4px 8px rgba(0, 0, 0, 0.1);
        }
        .ip-address {
            font-size: 1.8rem;
            color: #0d6efd;
            font-weight: bold;
        }
    </style>
</head>
<body>
    <div class="container text-center">
        <div class="ip-display">
            <h1>Your Public IP Address</h1>
            <p class="ip-address">{{ ip }}</p>
            <a href="/" class="btn btn-secondary mt-3">
                <i class="fas fa-arrow-left"></i> Back to Home
            </a>
        </div>
    </div>
</body>
</html>
Step 5: Running the Application
Run the development server:
python manage.py runserver
Visit the following URLs in your browser:
- Home Page: http://127.0.0.1:8000/

- IP Page: http://127.0.0.1:8000/myip
Step 6: Preparing for Production
- Use a Reverse Proxy: Configure Nginx or Apache to handle
X-Forwarded-Forheaders. - Update
.gitignore: Exclude sensitive files like the database and virtual environment:
myip-venv/
db.sqlite3
__pycache__/
Step 7: Deploying the Application
You can deploy your application to any hosting platform, such as:
- Heroku: Use the django-heroku package for quick deployment.
- AWS EC2: Set up a virtual machine and deploy with Nginx and Gunicorn.
- DigitalOcean: Use their Django droplet to simplify deployment.
Conclusion
Congratulations! You’ve successfully built and deployed a Django application that checks public IP addresses. This project is lightweight, user-friendly, and serves as a great starting point for more advanced Django projects.
Latest Comments
Sign in to add a commentNo comments yet. Be the first to comment!